Joystick - Remote Configuration Quick Start
Est. 8 minutes to complete.
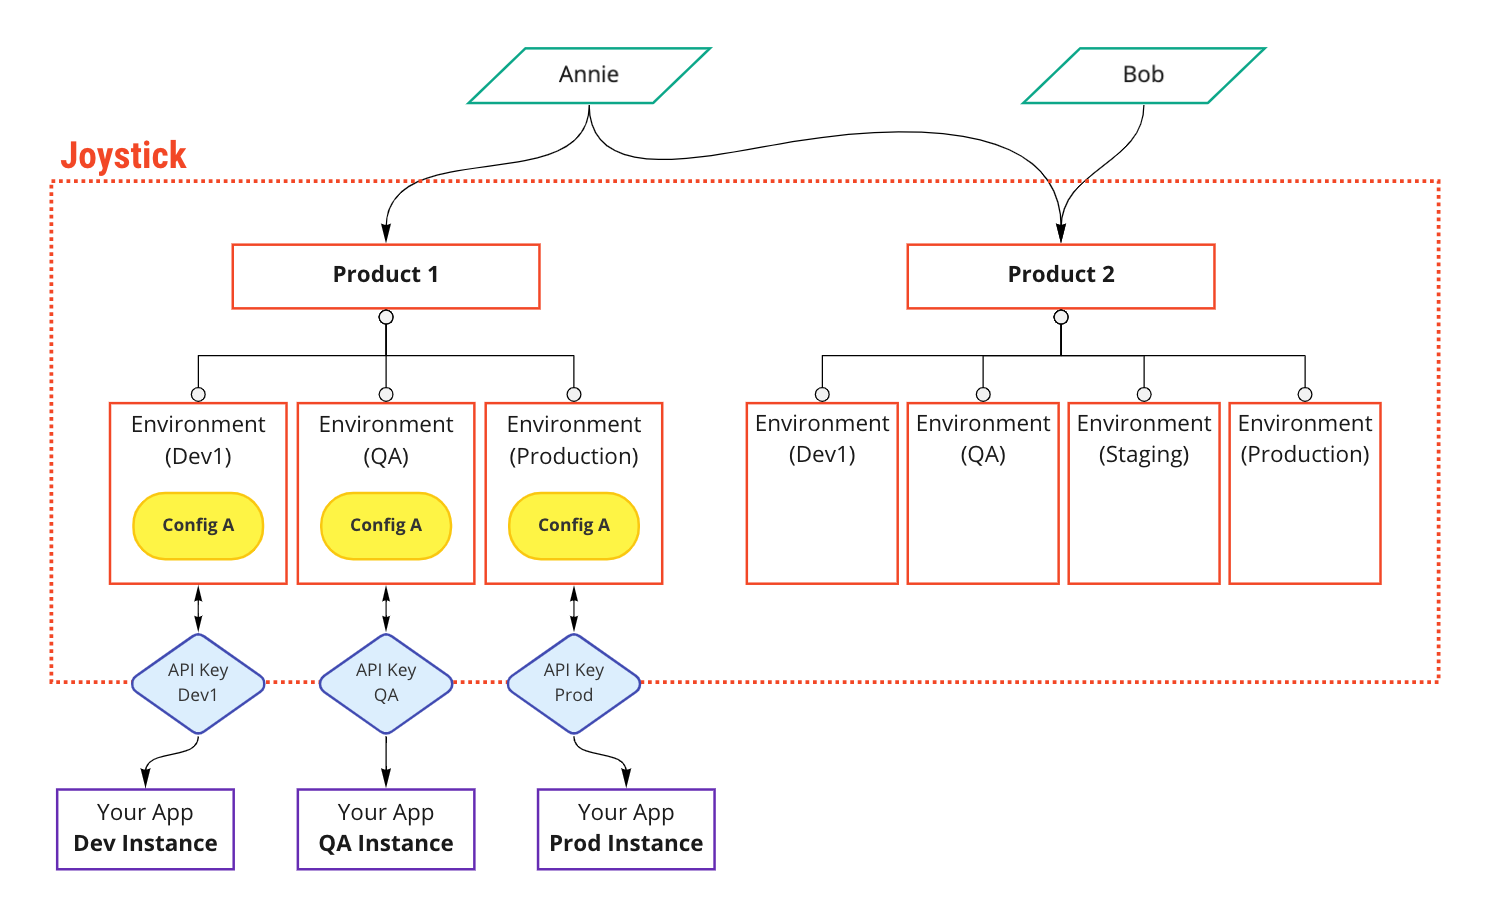
1. Understand the Hierarchy
| Component | Description |
|---|---|
| Organization | - An "Organization" represents your company, studio or working group. - An Organization can have multiple products. - Users for all of your products can be managed at the Organizational level. - Users can be Organization "Owners", "Editors", or "Members". |
| Product | - A "Product" can be created to match each distinctive application or game that you are building. - A user can create or be given access to one or more products. - A Product is where you invite other members of your team to collaborate. |
| Environment | - Each product can have multiple "Environments". - These can correspond to how your workflow and pipeline is setup. - Within each environment, there can be many configurations / content. |
| Content | - Content is your JSON or other configs. - Content is stored in each environment. - You can easily push and sync configuration content between environments. |
| API Keys | - API Keys are provisioned and managed at the environment level. - Each environment will have it's own API keys that give access to content in that environment only. - To access the same config, in a different environment, you will have to switch environment keys in your application instance. |
2. Create an Account
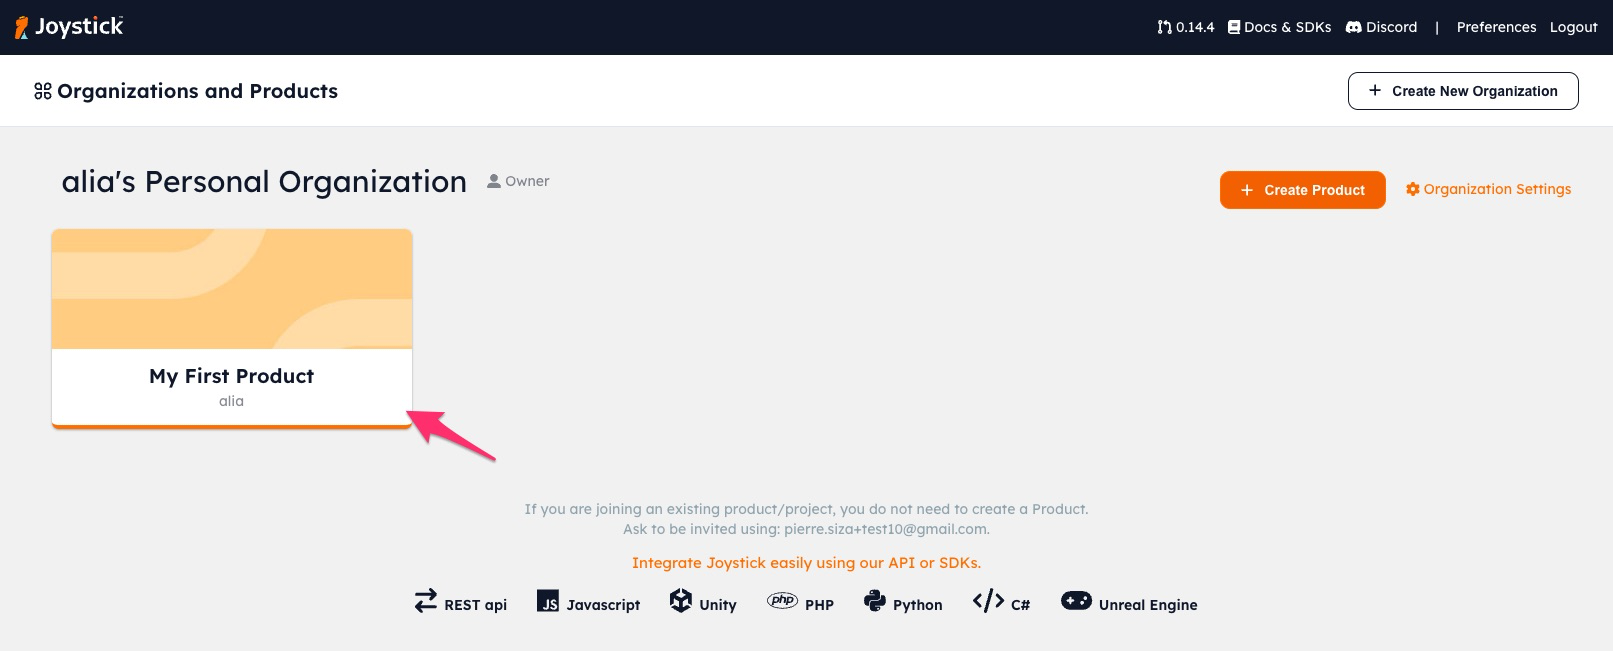
3. Access a Product
A "Product" should represent one particular app or game. When you first login, you will have an Organization with a default Product already created. Simply click on it.
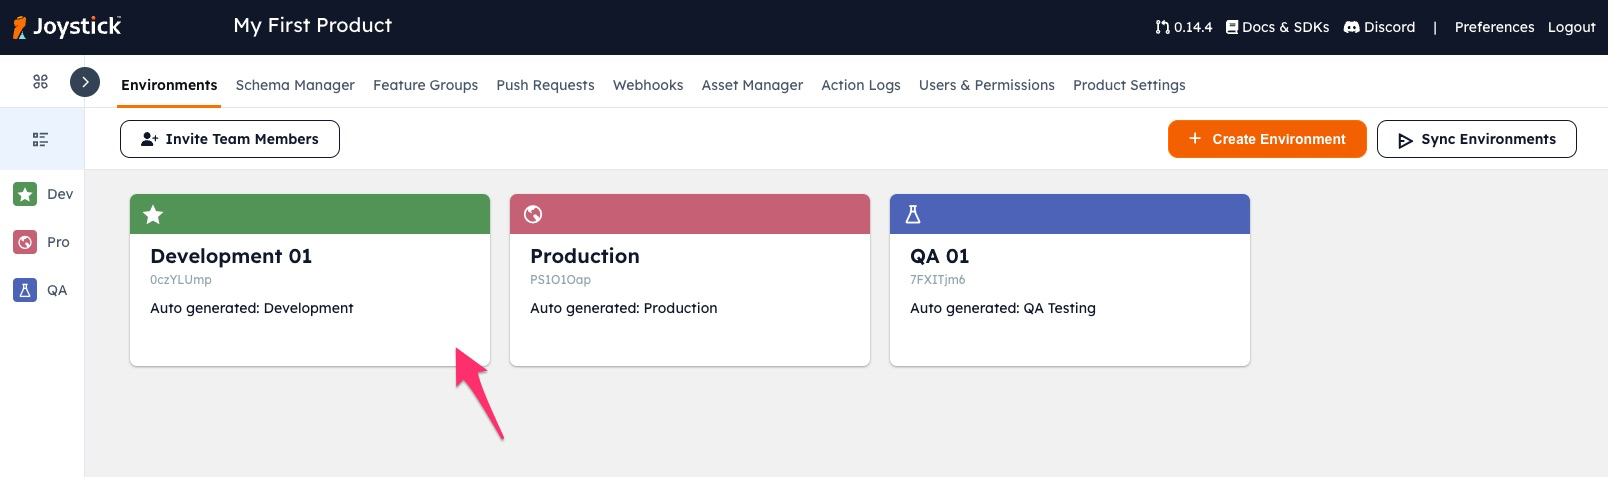
4. Access an Environment
An "Environment" is typically a container for one full set of configuration content required by your application or game. A typical setup may have four environments: "Development", "QA", "Staging" and "Production". In Joystick, you can easily sync/promote configuration content between environments.
You will see three default Environments already created. Let's go into Development.
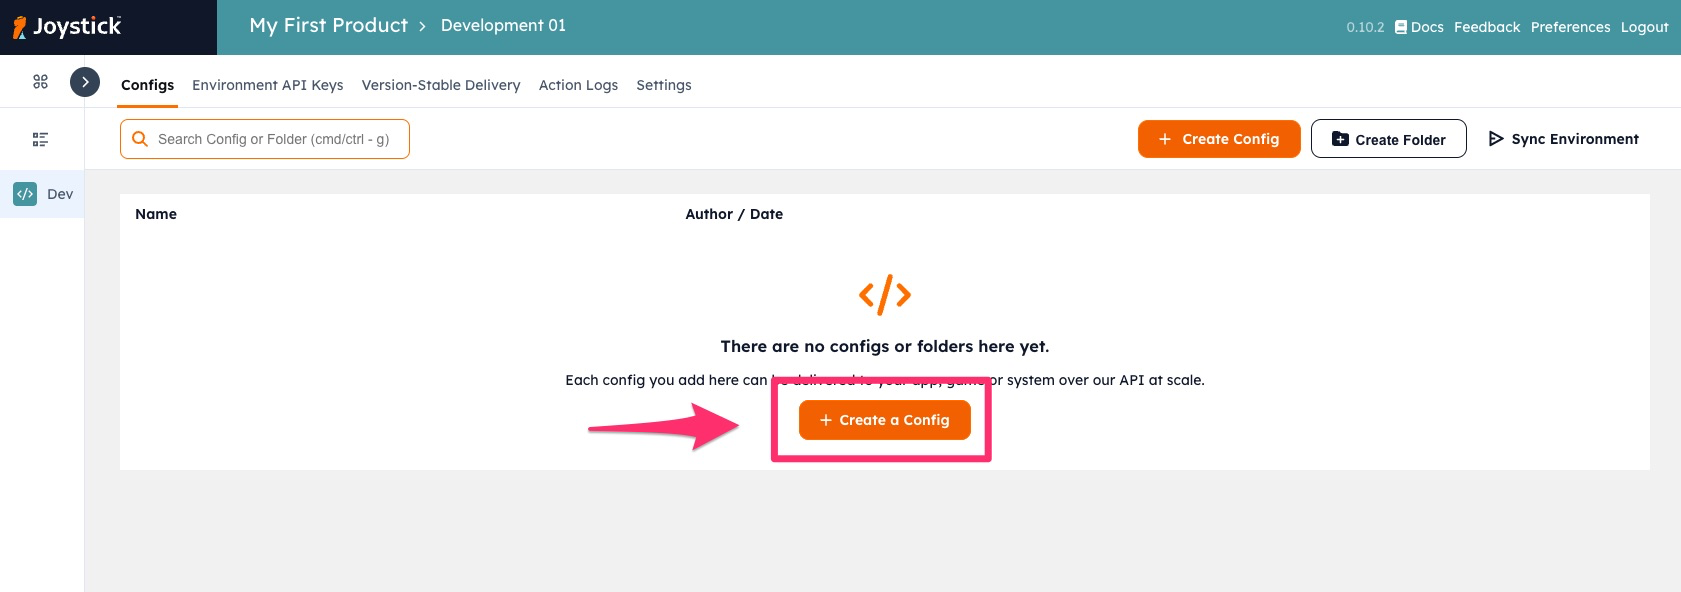
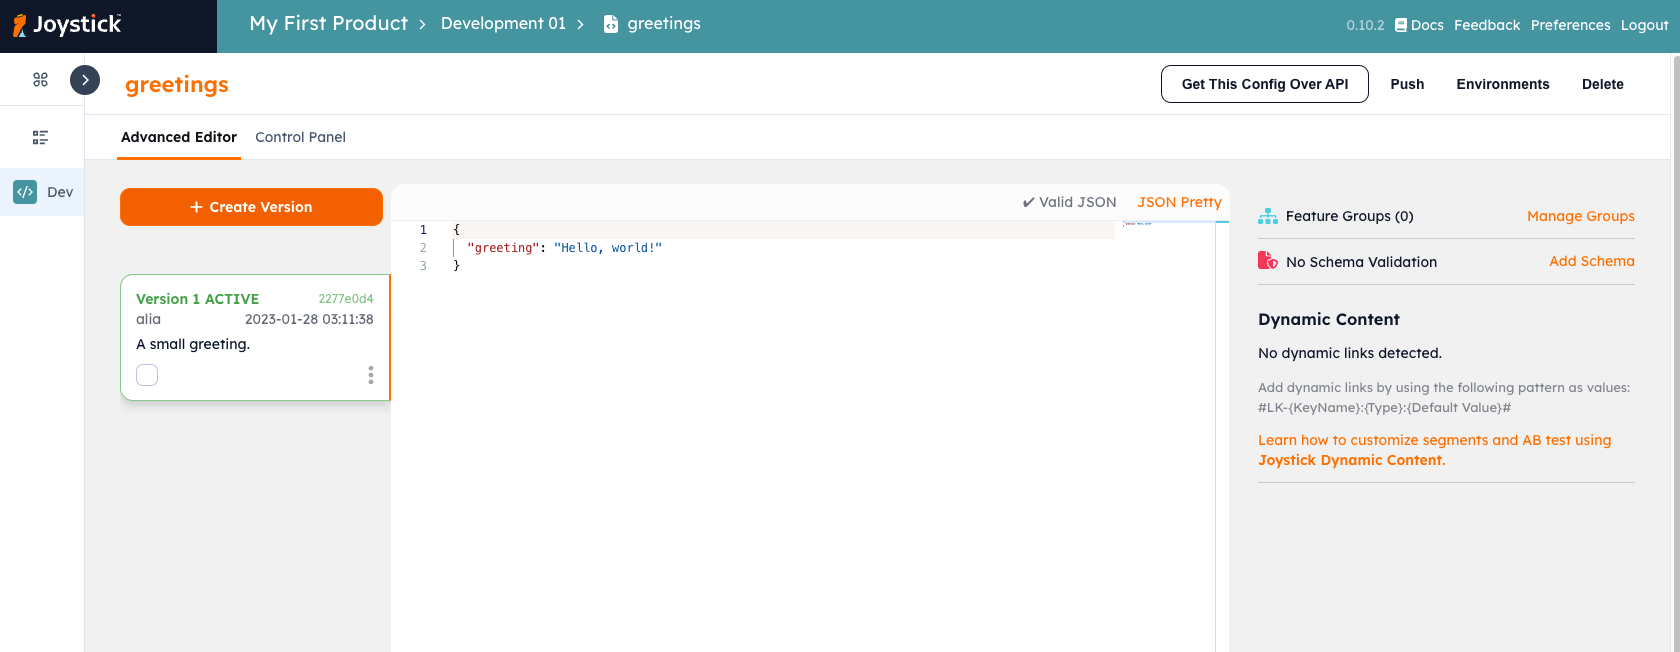
5. Add a Config
The environment is currently empty. Add your first piece of configuration/content to Joystick here. It can be any JSON content that you would like served to your application.
This is Joystick configuration content editor. You can place any valid JSON configuration here. We don't restrict you to simple key:value pairs.

| Input | Description |
|---|---|
| Content Id | This Content Id must be unique per environment. This is the identifier used to retrieve the content via API. |
| Description | Describes what this configuration version is for so others can understand the change. Best to keep this short and descriptive. |
| Folder | The folder where this content will be placed. You can move content around later. |
Try adding this simple snippet then saving.
Many Supported Content Types
We natively support JSON with many powerful features including validation, ab testing, and schema protection. However, we also support any string format configuration including XML, YAML, INI, plain text. Learn more.
Click "Save" on the top right and you will be taken to the content viewer. The top revision indicated as "Active" is available over the API.
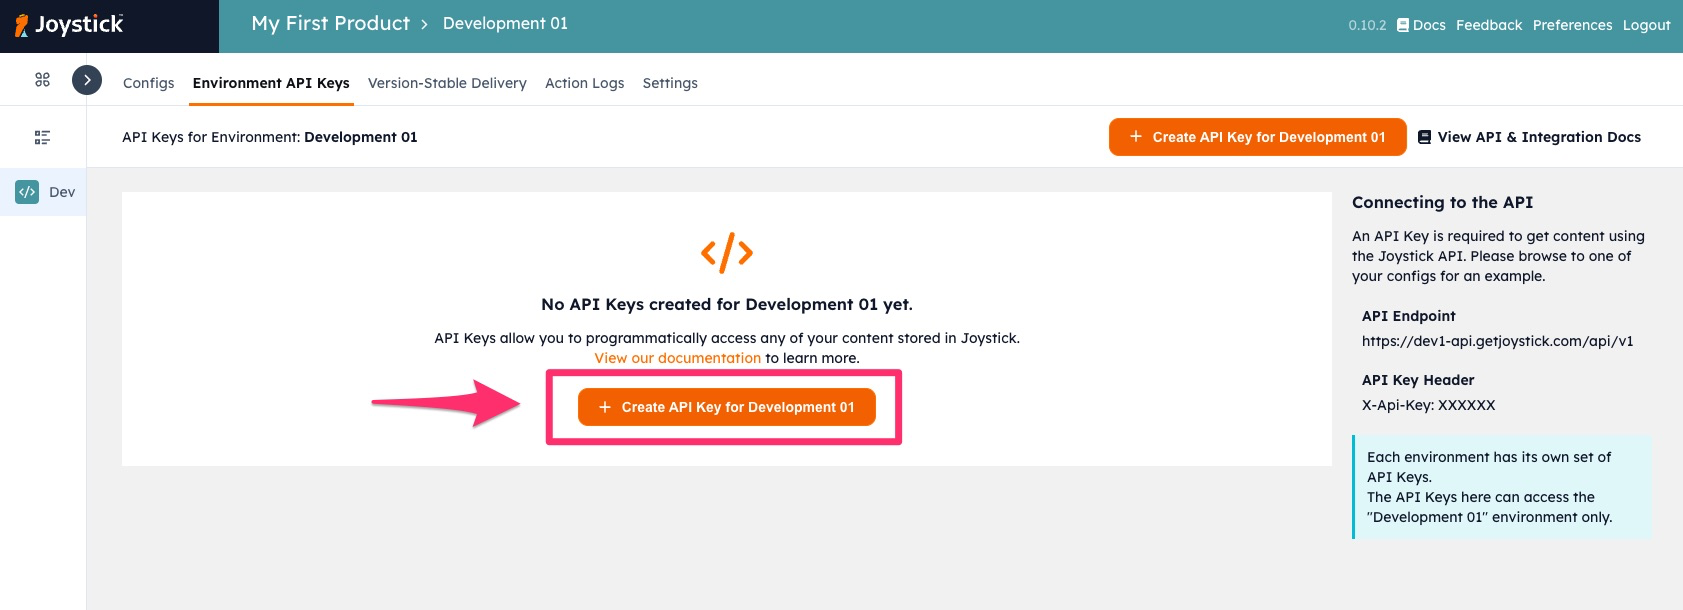
6. Generate an API Key
An API Key allows you to get your content over API. Click your environment name at the top, then "Environment API Keys" to go to the API Key manager. Create your first API Key.
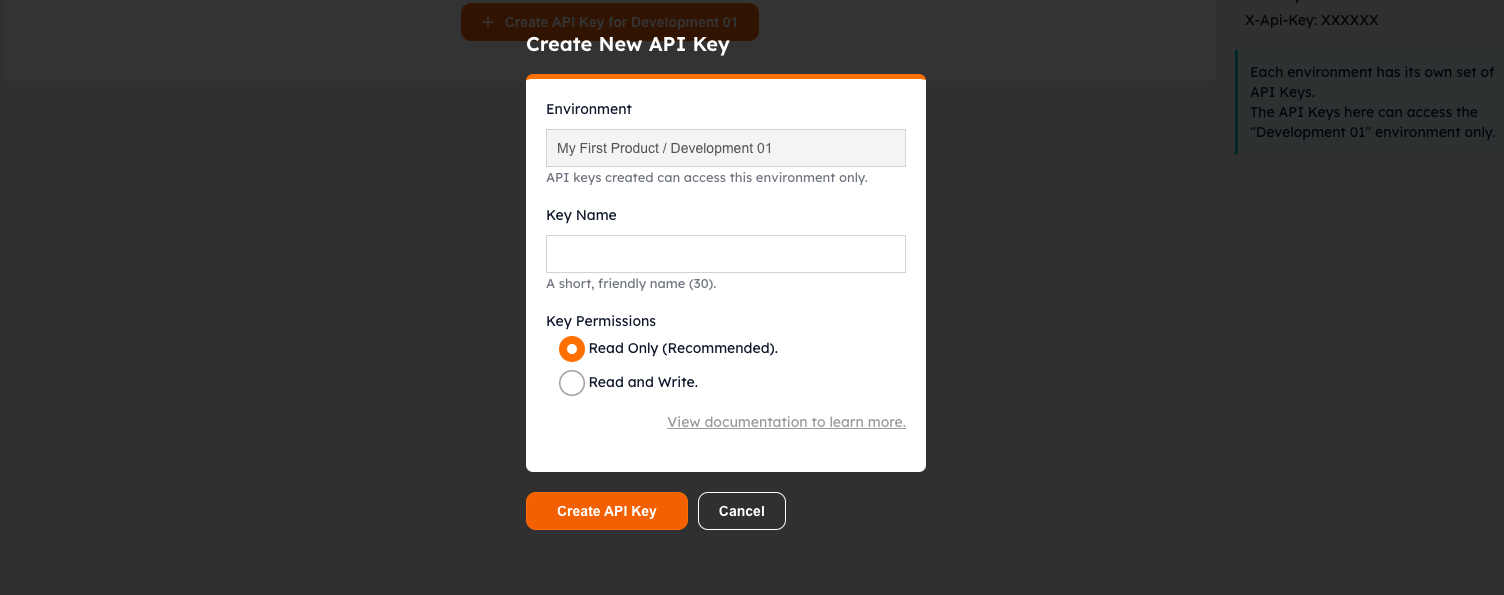
| Input | Description |
|---|---|
| Key Name | A short, friendly name to identify this key and its usage. |
| Key Permissions | Select "Read Only" for this example. |
Important Notes
- An API Key can get content only from the Environment it was created in.
7. Get Your Remote Configuration Content via API
We have SDKs!
We have SDKs for Javascript, Unity, Python and more to make getting remote configs for any app or game easy. See our SDKs!.
Request
End Point
Replace the :contentId indicated with the Configuration Content Id you created (If you are following the example, the ContentId is simply "greetings"). The :contentId is not case sensitive.
Header
| Header | Value | Required | Notes |
|---|---|---|---|
Content-Type |
application/json | Yes | |
X-Api-Key |
Your API Key | Yes | The API key created in step 6. |
Body
The request body should be JSON, and cannot be empty. It must at minimum consist of the following snippet. If you would like to dynamic content for segments or individual users, you will need to use the u and p attributes. You can learn more about this in our API integration guide.
Sample Request
Copy and paste this example into your termimal, then insert your API Key.
curl --location --request POST 'https://api.getjoystick.com/api/v1/config/:contentId/dynamic' \
--header 'X-Api-Key: YOUR-API-KEY' \
--header 'Content-Type: application/json' \
--data-raw '{"u": "", "p": {}}'
You will get back the content managed in Joystick.

Troubleshooting
Having issues? View our troubleshooting guide or contact us on Discord.
Response
By default your content is returned as the "data" object in the response body.
The additional parameters are for segmentation and ab testing; they can be optionally turned off. View the API Reference for other options.
- Get your configuration without the
"data"wrapper. - Get your configuration serialized.
- Get multiple pieces of configuration at the same time.
What's Next?
This is just scratching the surface of the features we have in Joystick.