Dynamic Content - Specific Value Replacement - Setup Guide
Est. 9 minutes to complete.
Follow this guide to understand how to setup dynamic content, segmentation and ab testing in Joystick. In this scenario, we will use Joystick to Segment and AB Test a hypothetical marketing offer. Go through the Joystick Quick Start first if you have not yet.
1. The Setup
Copy the below snippet, then create a new config in Joystick called "simple_offer". You can just remove the config from your environment after you are done.
2. Get the Offer
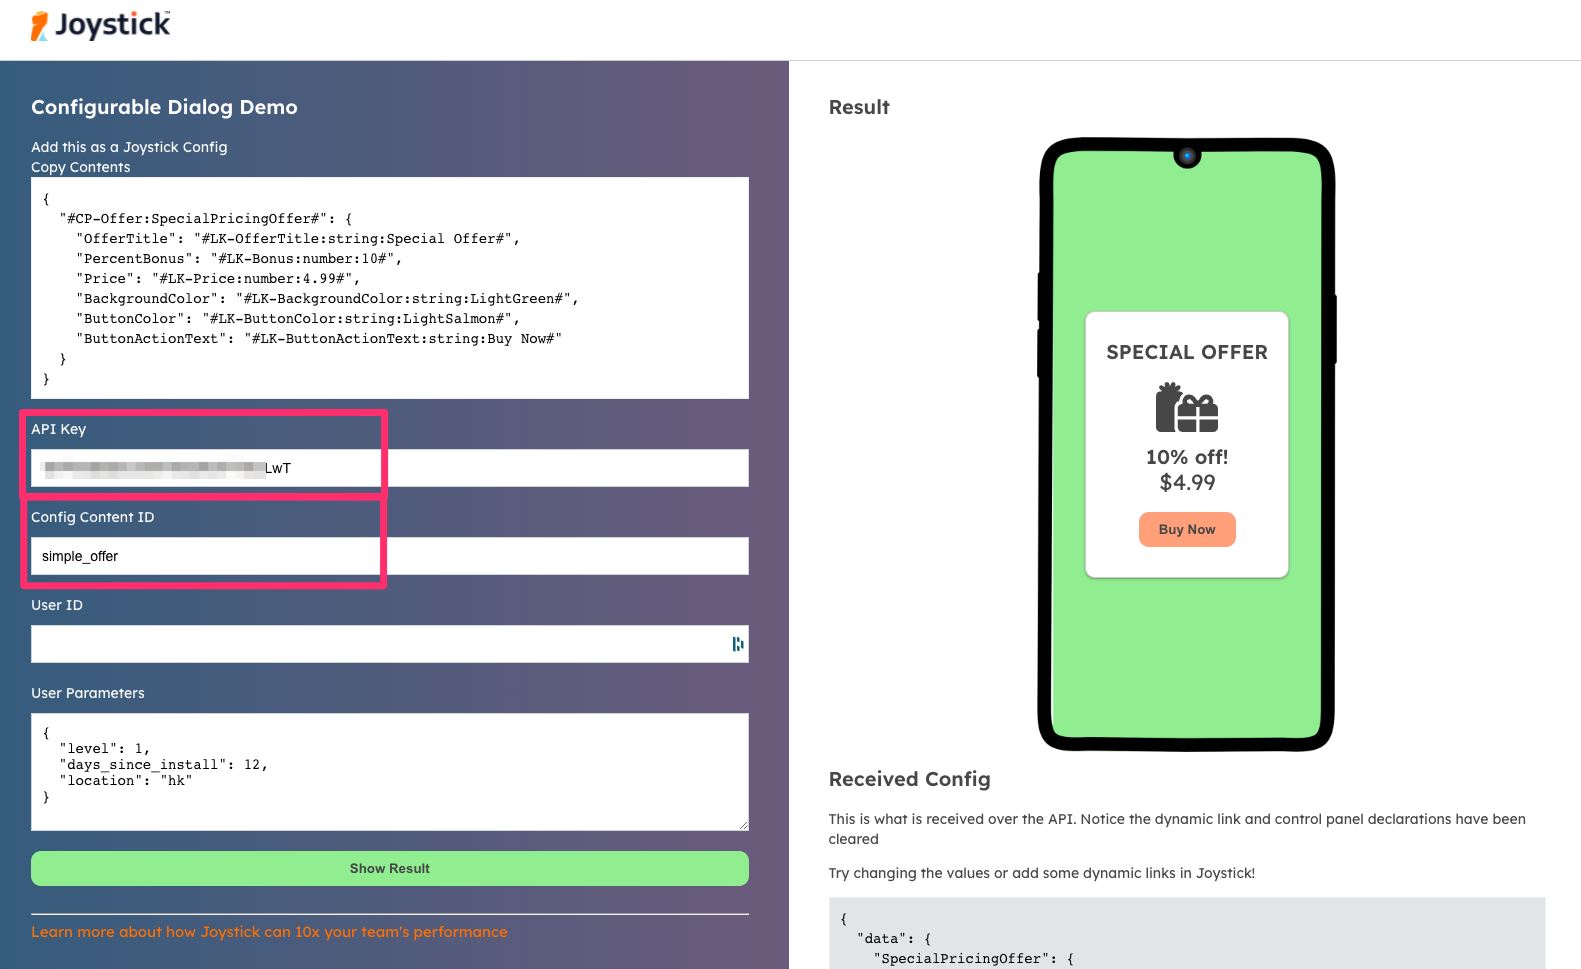
Get an API key in the environment where you created "simple_offer", then head over to our offer Dynamic Content demo page using this link.
Dynamic Content Demo: https://app.getjoystick.com/demo
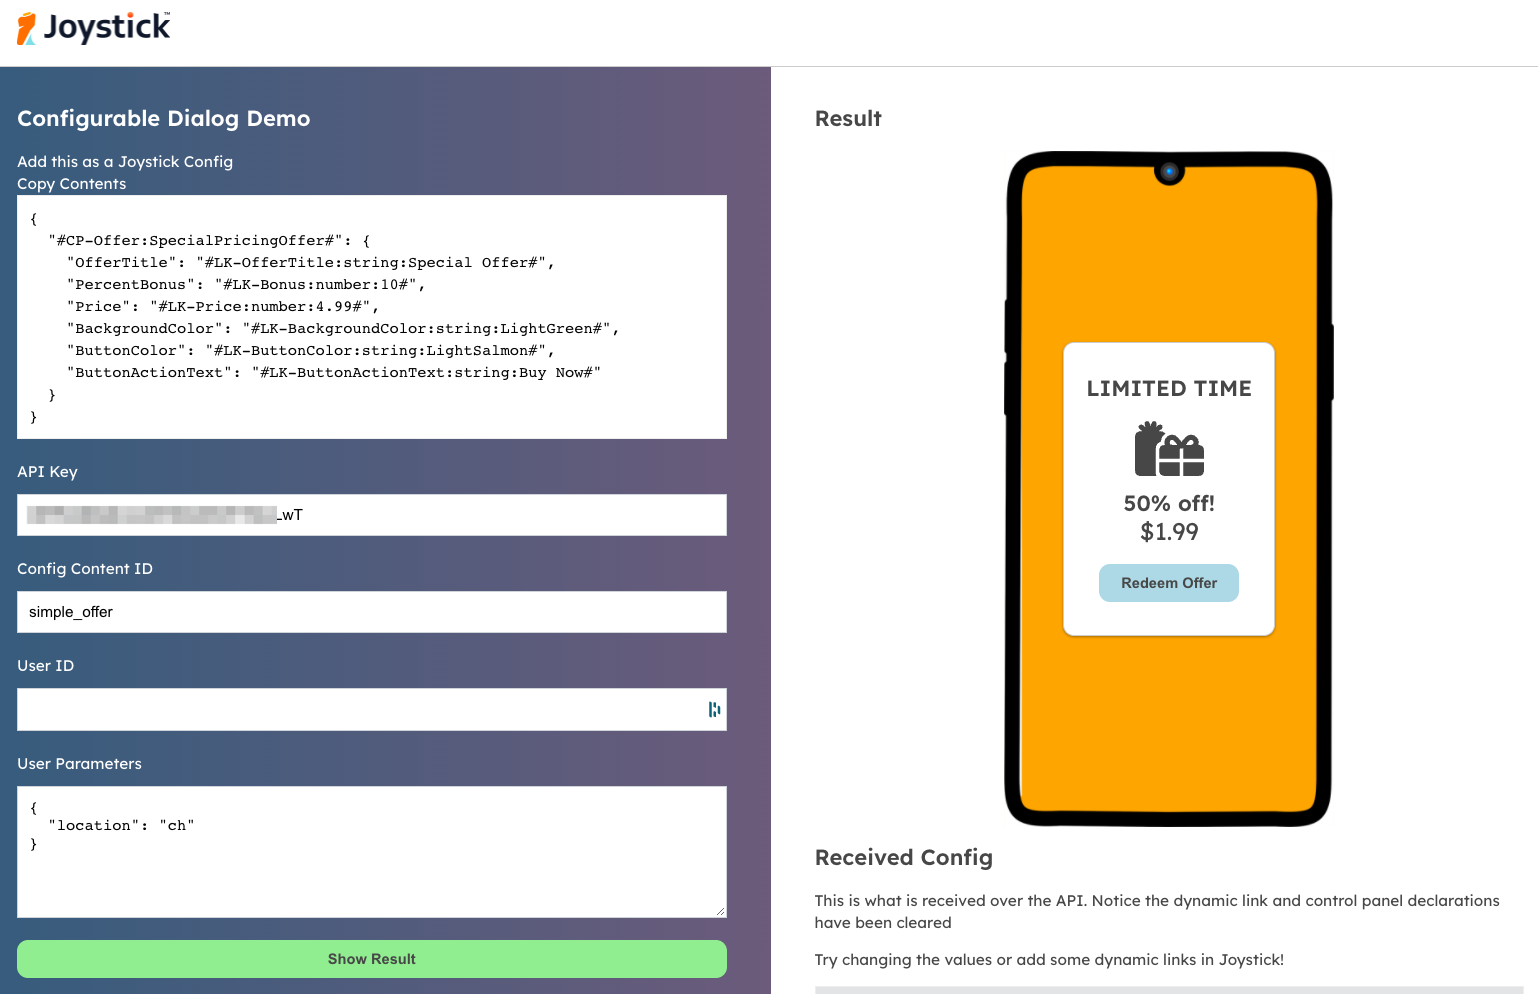
Paste your API Key and Config Content Id, click "Show Result". The demo page makes a simple call to the Joystick API, gets the config content you just created, and renders the offer on the right.
3. Declare Dynamic Content
Let's setup an AB test of the offer title, but only for users in Switzerland.
First, declare dynamic content in the configuration. Take a look at the updated configuration below.
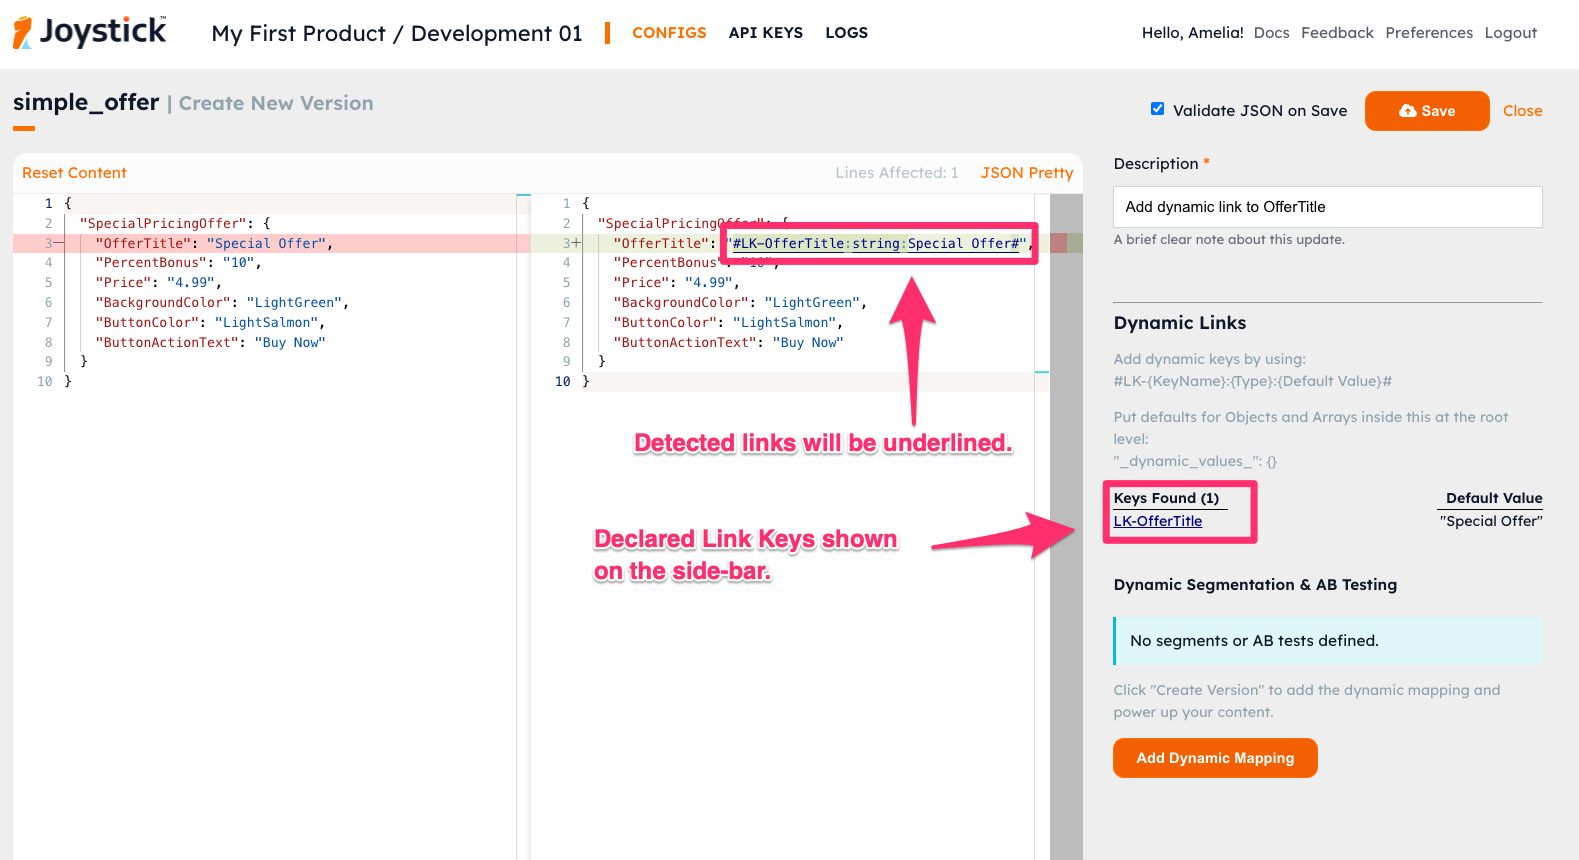
Create a new version of simple_offer and paste in the updated JSON snippet from above (Don't hit save yet).
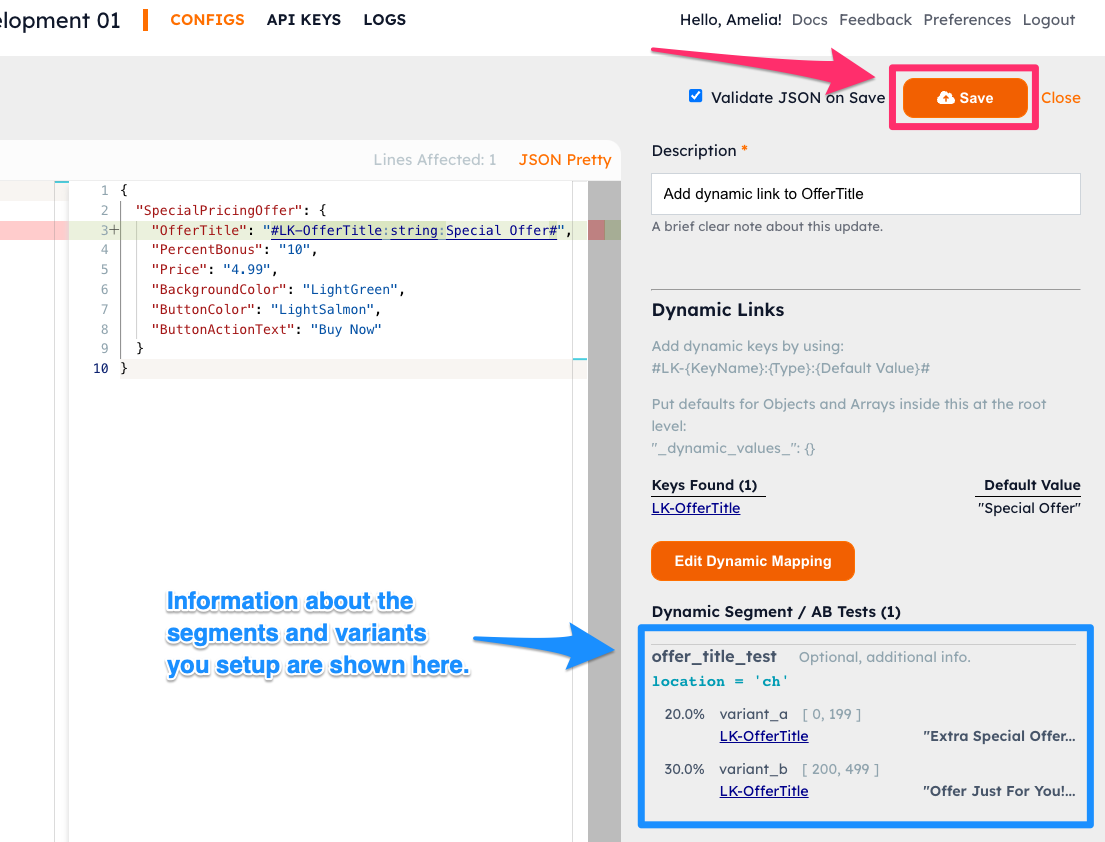
If you have used the correct declaration syntax, then the detected key will show up on the right side panel, along with the default value.
The Joystick Link Key
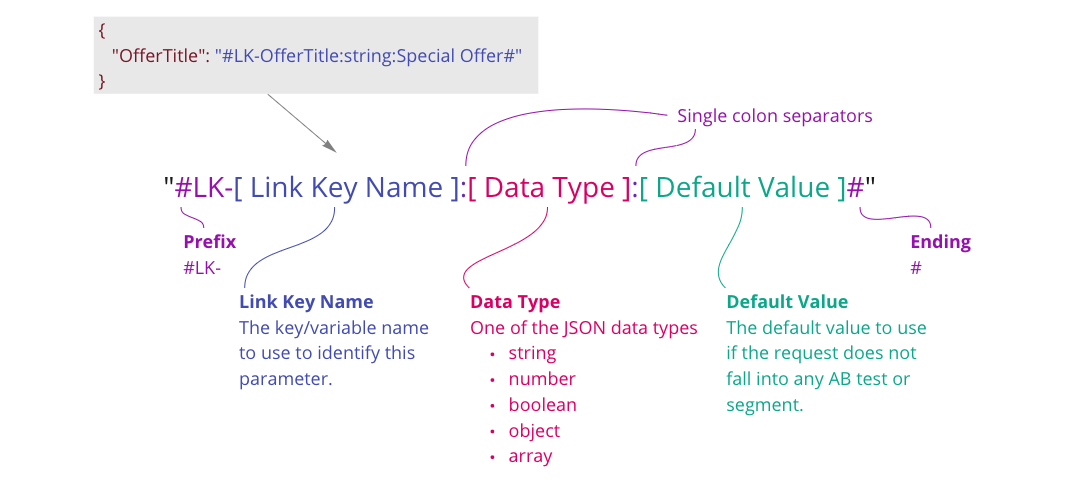
The Joystick Link Key is what makes our system so powerful, and straight forward to understand. You declare using a simple syntax any parameters in the configuration that you want to make active. When we send the JSON out over the API, the Link Keys are all scrubbed and replaced with either the default value, or the dynamic value based on segmentation or AB test matches.
Link Key Parts
| Item | Explanation |
|---|---|
| Pre-fix | The prefix must be four characters "#LK-" (Link Key) |
| Link Key Name | Used to map the response variables into the correct place in the configuration |
| Data Type | One of the six JSON standard data types: string, number, boolean, object, array. |
| Default Value | The value to use if there is no match to a rule. Please see the In Depth Usage guide for dealing with objects and arrays. |
| Post-fix | The end of the string must be the hash symbol "#" |
4. Setup the Segmentation and AB Test
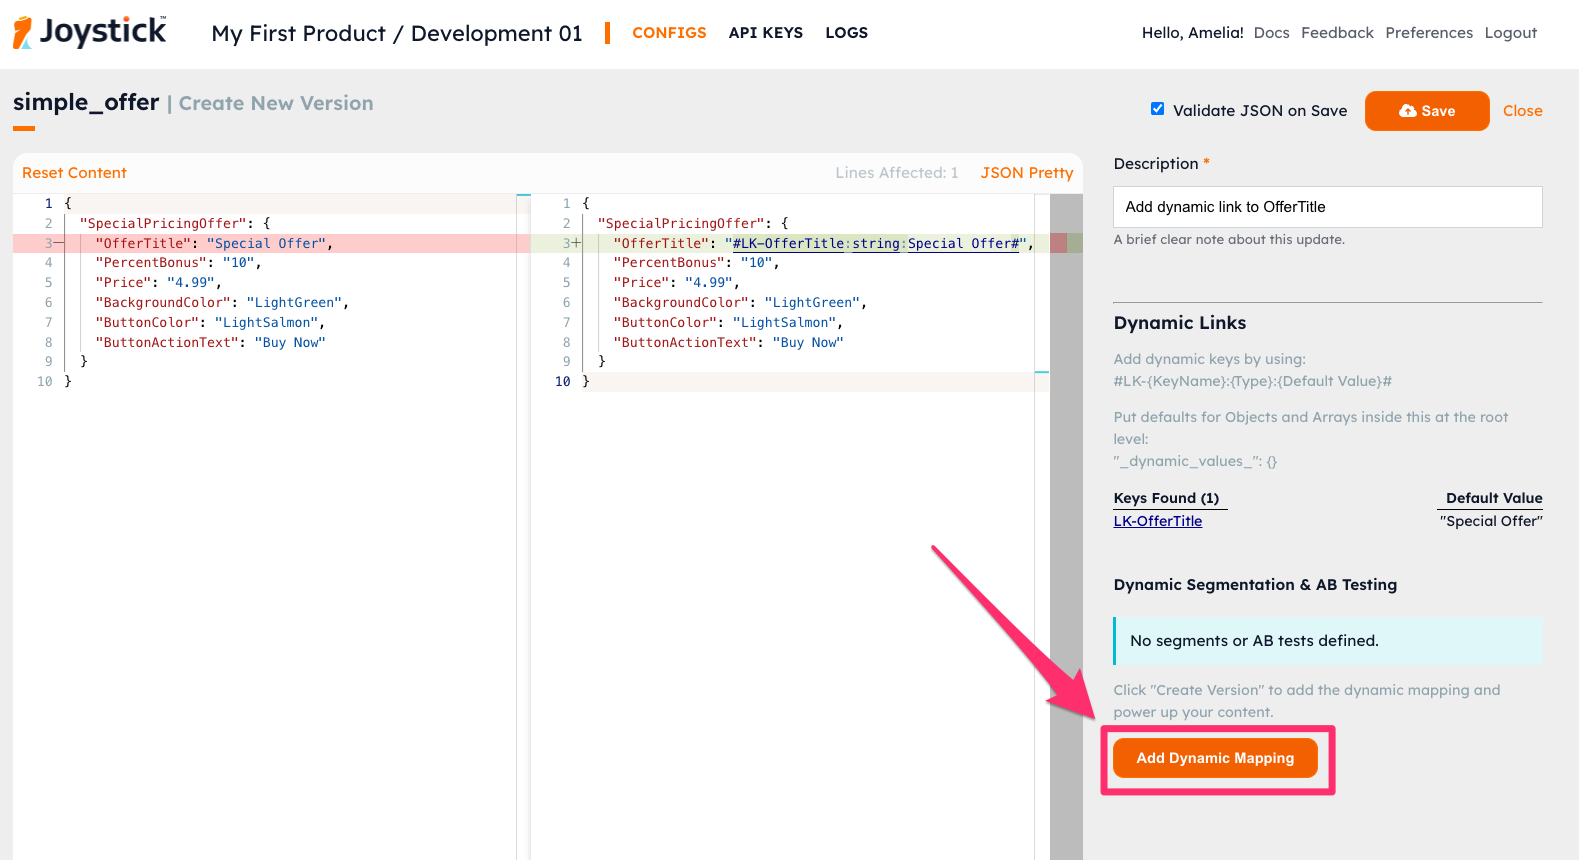
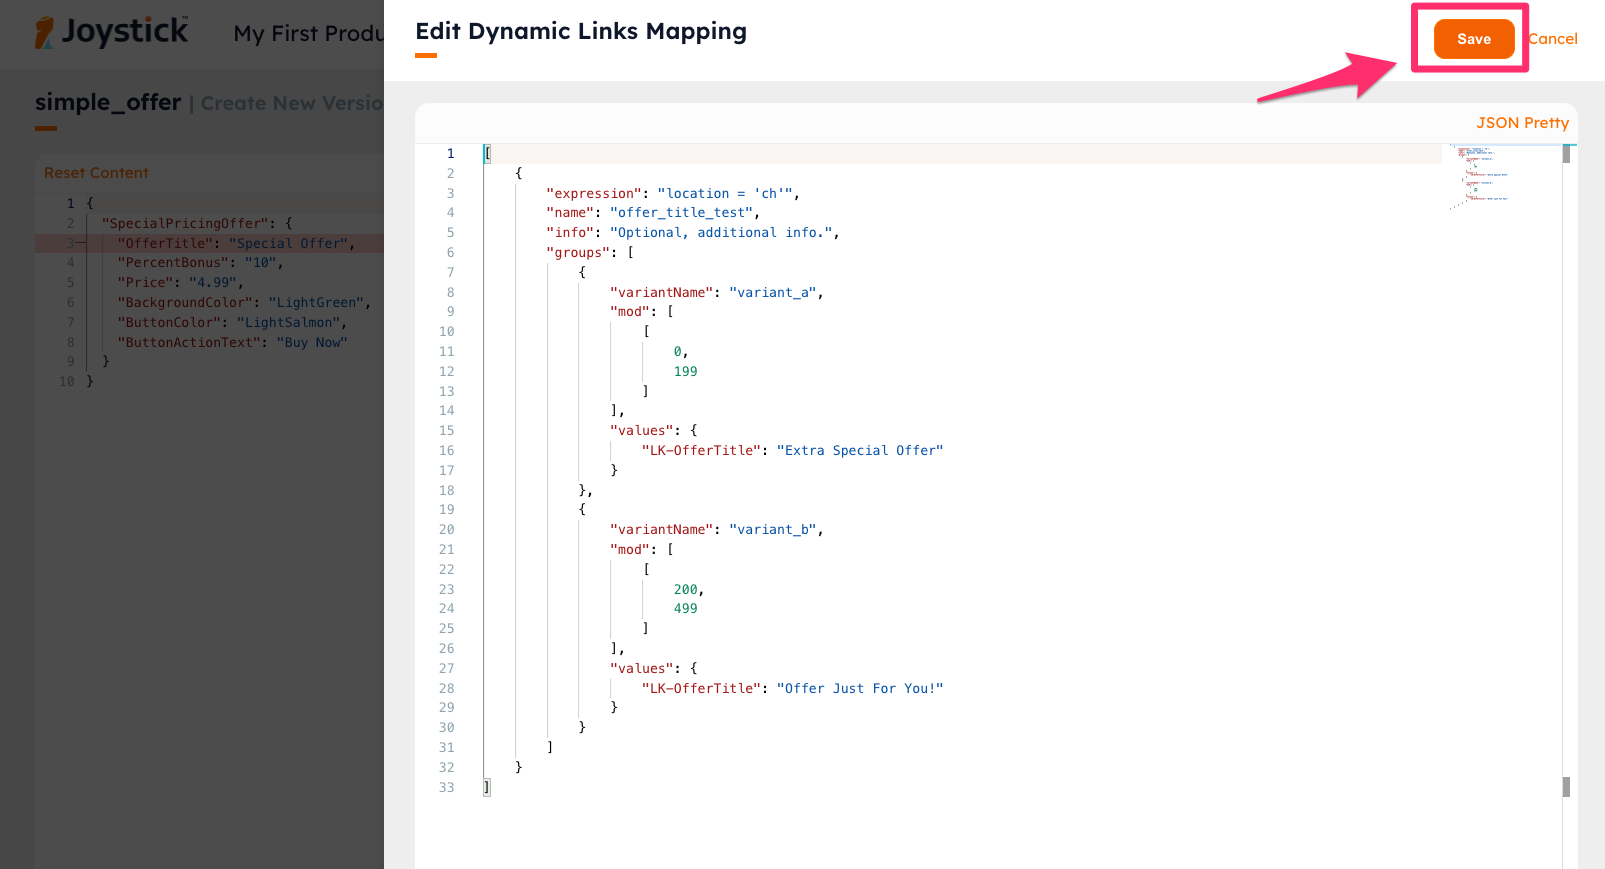
Click on the "Add Dynamic Mapping" button to open the Dynamic Links editor panel.
The Dynamic Map defines how the data will be transformed for different segments or ab tests. Copy and paste the following snippet Dynamic Mapping into the panel and click "Save". Don't worry, we explain in Section 6 below.
[
    {
        "expression": "location = 'ch'",
        "name": "offer_title_test",
        "info": "Optional, additional info.",
        "groups": [
            {
                "variantName": "variant_a",
                "mod": [
                    [0, 199]
                ],
                "values": {
                    "LK-OfferTitle": "Extra Special Offer"
                }
            },
            {
                "variantName": "variant_b",
                "mod": [
                    [ 200, 499]
                ],
                "values": {
                    "LK-OfferTitle": "Offer Just For You!"
                }
            }
        ]
    }
]
You will notice that on the right of the config editor, the added segmentation information will be shown. Click "Save" in the top right to add this new version of the configuration with the segmentation information to Joystick.
5. Segmentation and AB Testing in Action
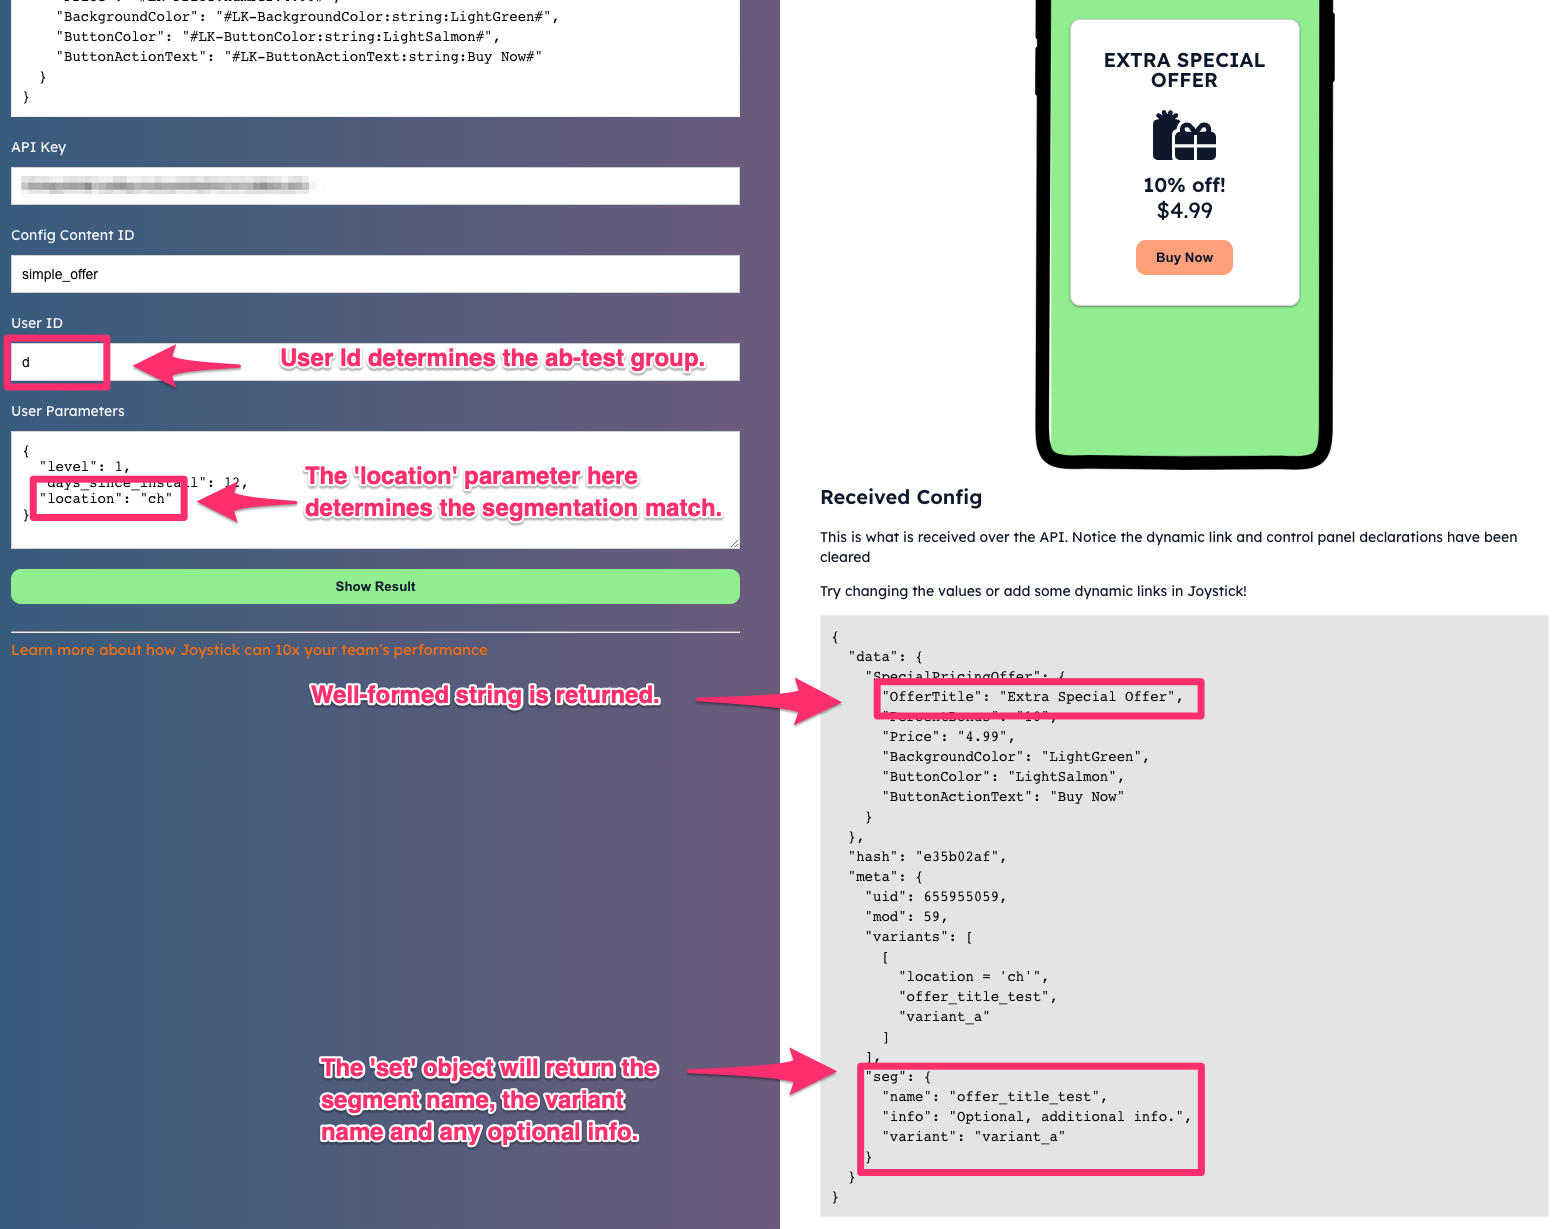
Go back to the Dynamic Content Demo page.
On the left panel, do the following
- Make sure the API Key is correctly filled in.
- Make sure the Config Content Id is correctly filled in (
simple_offerif you are following the example). - Fill in the letter
d(lower case) for the User ID - In User Parameters, set location to ch:
"location": "ch"
Click "Show Result", and on the right side you will see that the Offer Title has been changed!
Try the following combinations...
| Request Parameters | Description |
|---|---|
User ID: d"location": "fiji" |
You'll see the title is default "Special Offer" because the location segmentation does not match the necessary "ch". |
User ID: e"location": "ch" |
You'll see the title is default "Special Offer" because the User ID does not fall into the AB testing group. |
User ID: h"location": "ch" |
You'll see that the title changes to "Offer Just For You", which is the title of my_offer_variant_B because the User ID "h" falls into that group. |
Extending the Example
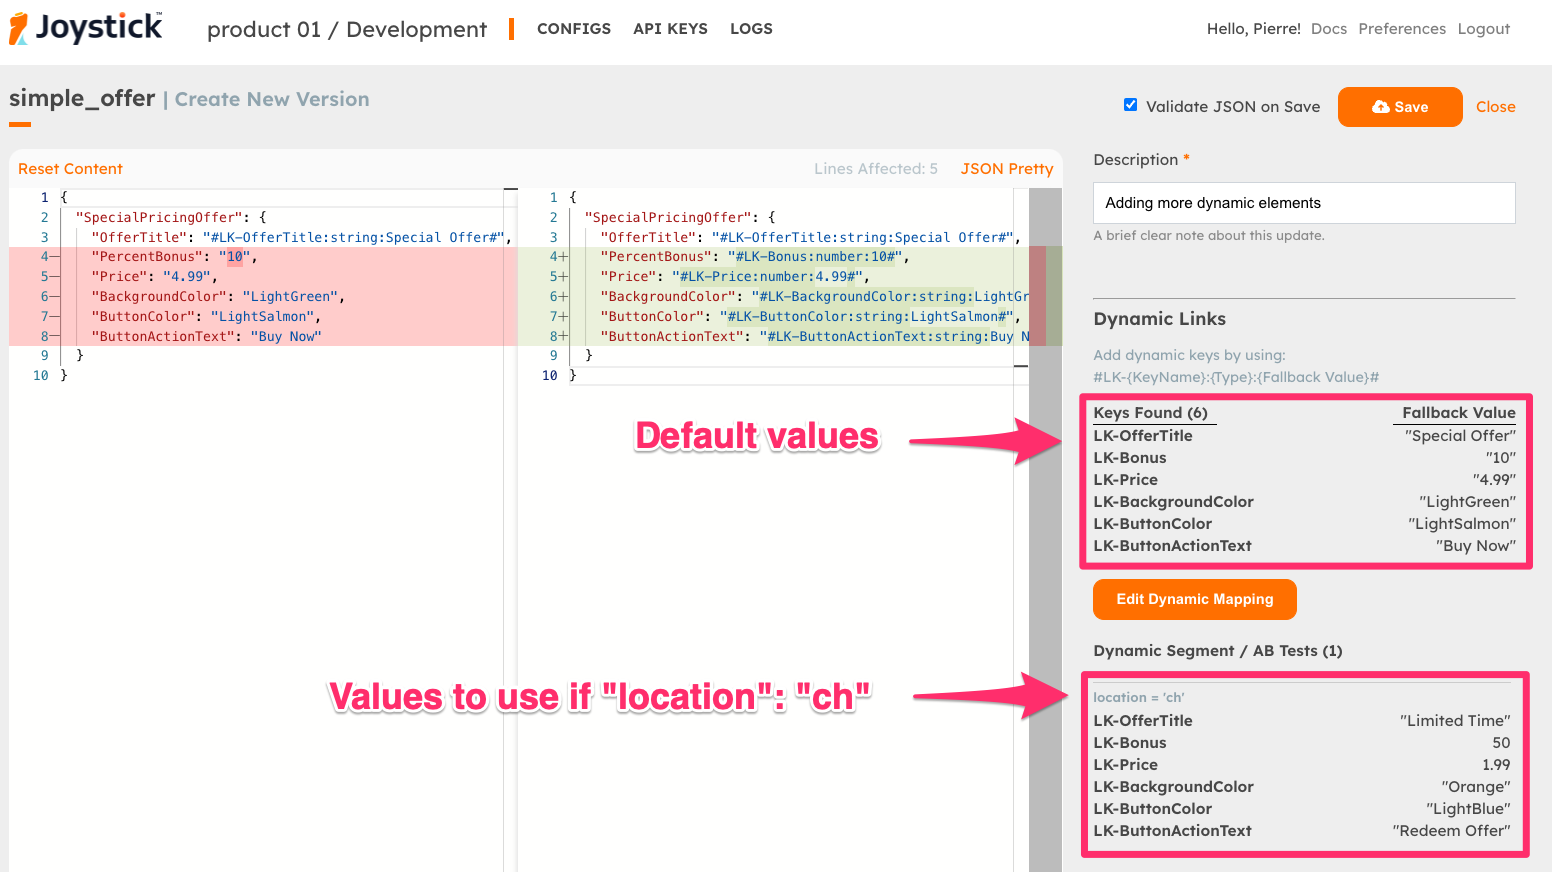
Now that you have create a simple overlay, let's add a few more variables. Create a new version of simple_offer, then update the Configuration Content and Dynamic Mapping with the following two snippets.
{
  "SpecialPricingOffer": {
    "OfferTitle": "#LK-OfferTitle:string:Special Offer#",
    "PercentBonus": "#LK-Bonus:number:10#",
    "Price": "#LK-Price:number:4.99#",
    "BackgroundColor": "#LK-BackgroundColor:string:LightGreen#",
    "ButtonColor": "#LK-ButtonColor:string:LightSalmon#",
    "ButtonActionText": "#LK-ButtonActionText:string:Buy Now#"
  }
}
Go back to the Dynamic Content Demo page. This time with just "location": "ch", you should see some dramatic differences in the offer.
What's Next?
Nice! You just setup content with segmentation and ab-testing. There's much more!
Learn More!
We are just scratching the surface! Go now to Dynamic Content - In Depth Usage for details on how to use Joystick Dynamic Content.

